
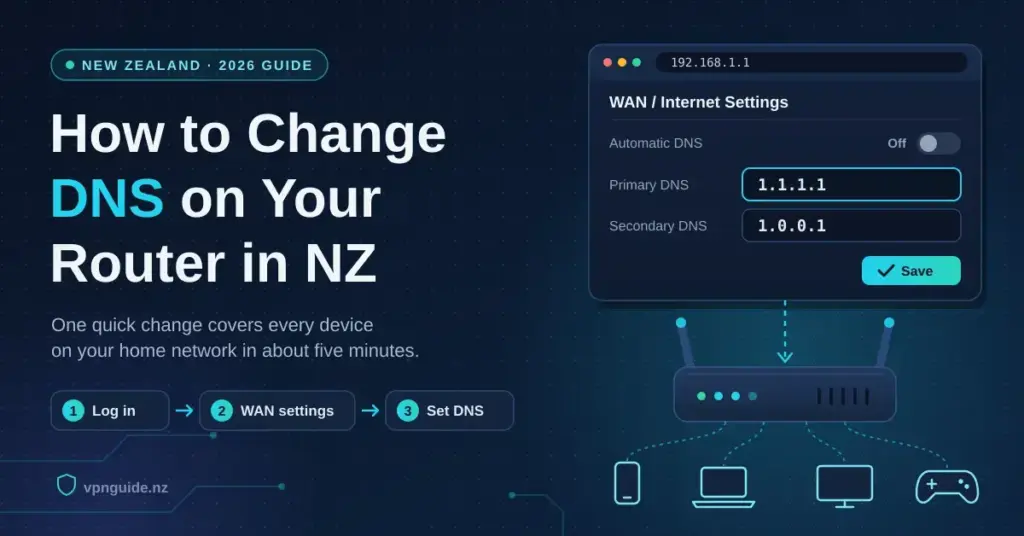
Changing the DNS resolver your router hands out is one of the quickest ways to make a New Zealand home network feel snappier and a little more private, and it takes about five minutes. In short: log in to your router’s admin panel (usually at 192.168.1.1 or 192.168.0.1), open the WAN or Internet settings, and swap the DNS server addresses for the ones you want. The change flows to every device on the network at once, so you never have to touch individual phones, laptops, consoles or smart TVs. This guide covers what to change, the resolvers worth using from an Auckland connection, and how to confirm it actually worked.
Key Points
- One change, whole network: setting DNS on the router covers every device via DHCP — phones, laptops, consoles and smart TVs — without touching each one.
- Where to do it: log in at 192.168.1.1 or 192.168.0.1, open WAN / Internet settings, turn off automatic DNS and enter your chosen primary and secondary addresses.
- Good NZ defaults: Cloudflare (1.1.1.1 / 1.0.0.1) and Google (8.8.8.8 / 8.8.4.4) both have Auckland servers; Quad9 (9.9.9.9) adds malware blocking with no query logging.
- Set the secondary too, and add IPv6 DNS (Cloudflare: 2606:4700:4700::1111 / ::1001) so no queries slip back to your ISP.
- Not a VPN: a DNS change does not encrypt traffic, hide your IP or unlock overseas streaming — that needs a VPN or Smart DNS.
- Always test afterwards at 1.1.1.1/help or a DNS leak test, flushing the cache first.
What DNS is, and why the router is the right place to change it
DNS stands for Domain Name System — the internet’s address book. Every time you type a website name, your device asks a DNS “resolver” to translate that name (for example, vpnguide.nz) into the numeric IP address a computer actually connects to. Your router already tells every device on your network which resolver to use, so changing it once on the router applies the new resolver to the whole household. Do it on a single laptop and only that laptop benefits; do it on the router and your TV, console, phones and guests all follow along.
Why NZ users might change their DNS
When you connect through Chorus fibre — whether that is a Spark, One NZ or 2degrees plan — your provider assigns DNS resolvers automatically. Those resolvers are run by your ISP, which means a record of the domains your household looks up can sit with a company operating under New Zealand’s Telecommunications (Interception Capability and Security) Act 2013 and within the Five Eyes intelligence-sharing arrangement. Even when the page itself is encrypted over HTTPS, a plain DNS lookup on port 53 still reveals which domain you asked for.
The Privacy Act 2020 governs how your personal information is handled, but it does not stop an ISP from keeping DNS logs for network operations. Moving to a third-party resolver — particularly one that supports DNS-over-HTTPS (DoH) or DNS-over-TLS (DoT), two ways of encrypting the lookup itself — shifts those records away from your ISP and, with some providers, removes query logging altogether. Cloudflare’s approach is set out in its 1.1.1.1 public DNS resolver privacy policy.
There is also a speed angle. ISP-assigned resolvers are not always the fastest, and a sluggish resolver adds a small delay to every new connection your browser opens. A resolver with a local Point of Presence (PoP) — a data-centre location — in Auckland returns answers faster than one that routes your query to Sydney or beyond. On a Chorus Hyperfibre line, where plans now reach 8 Gbps, that resolver latency is often the most noticeable remaining drag on how quickly pages start to load.
Finally, there is content filtering. Some households use DNS-level filters — such as Cloudflare’s 1.1.1.3 family option or OpenDNS FamilyShield — to block malware and adult content across the whole network. Doing it on the router covers devices that cannot set their own DNS, such as smart TVs and gaming consoles. New Zealand’s national cyber-safety service also has practical advice on locking down the rest of your setup in its guide to securing your home network.
What you need before you start
- Your router’s admin IP address (check the label on the device, or on Windows open Command Prompt, run ipconfig and read the “Default Gateway”).
- Your router’s admin username and password (also usually on the label; if you have never changed them, they are often admin / admin or admin / password).
- The DNS server addresses you intend to use (see the comparison below).
- A couple of minutes and a willingness to reboot if something goes wrong. If you are not sure which box is the router, our explainer on the Chorus ONT and router spells out the difference between the two.
If your router came from your ISP — a Spark Smart Modem, a One NZ-branded Technicolor or a 2degrees-supplied device — the admin interface may be simplified. See the ISP-router notes below.
Step-by-step: changing DNS on your router
Menu labels differ by brand, but the process is the same across ASUS, TP-Link, Netgear, D-Link, Ubiquiti and the ISP-supplied units common in New Zealand.
- Connect to your network. Any device on the network works; a wired connection is slightly more reliable for admin tasks, but Wi-Fi is fine.
- Open your router’s admin IP in a browser. Try 192.168.1.1 first. If nothing loads, try 192.168.0.1 or 10.0.0.1. Spark Smart Modems usually use 192.168.1.1; some Chorus ONT setups use 192.168.0.1.
- Log in. Enter your admin credentials. If the defaults do not work and you have lost the password, a factory reset (hold the reset button for 10–30 seconds) restores them — but this also wipes any custom Wi-Fi settings, so note them first.
- Find the WAN or Internet settings. On TP-Link this is under Advanced > Network > Internet; on ASUS under WAN > Internet Connection; on Netgear under Internet > Internet Setup; on D-Link under Setup > Internet.
- Locate the DNS fields. Look for “Primary DNS” and “Secondary DNS”, sometimes behind an “Advanced” toggle. They may currently show your ISP’s addresses or read “Automatic” / “Get from ISP”.
- Turn off automatic DNS and enter your addresses. Uncheck any “Get DNS automatically” option, then type your primary and secondary addresses into the two fields.
- Save and apply. Most routers apply the change without a full reboot; some firmware asks for one.
- Verify it worked. On any device on the network, visit 1.1.1.1/help (if you set Cloudflare) or run a DNS leak test to confirm queries are leaving through your new resolver. Cloudflare’s own router setup guide lists the exact fields for many models.
Notes for ISP-supplied routers in NZ
Spark Smart Modem (Sagemcom or Technicolor): log in at 192.168.1.1, then go to Advanced Settings > WAN > DNS Settings. The interface is simplified but the DNS fields are reachable without any unlock step.
One NZ (Vodafone-era) Technicolor: log in at 192.168.1.1, open Home Network > Interfaces > WAN, click Configure, and the DNS fields appear under the IPv4 section.
2degrees-supplied routers: most residential customers get a TP-Link or Huawei unit. TP-Link admin is at 192.168.0.1 and follows the standard TP-Link path above.
If an ISP router genuinely locks out DNS configuration — rare on NZ residential plans, but it happens on some managed business services — the workaround is to put the ISP device into bridge mode and run your own router behind it, or to set DNS manually on each device.
Recommended DNS resolvers compared
The table below covers the resolvers most relevant to NZ users. Latency figures are indicative: Cloudflare and Google both operate Auckland PoPs, so round trips from an Auckland connection are typically well under 5 ms, while resolvers without local infrastructure route to Sydney (~28 ms) or further.
DNS Provider Comparison
| Provider | Primary DNS | Secondary DNS | Logs queries? | DoH / DoT | NZ PoP | Cost |
|---|---|---|---|---|---|---|
| Cloudflare (1.1.1.1) | 1.1.1.1 | 1.0.0.1 | No (24h purge) | Yes / Yes | Yes (Auckland) | Free |
| Google Public DNS | 8.8.8.8 | 8.8.4.4 | Yes (anonymised) | Yes / Yes | Yes (Auckland) | Free |
| Quad9 | 9.9.9.9 | 149.112.112.112 | No client IP | Yes / Yes | Yes (Auckland) | Free |
| OpenDNS Home | 208.67.222.222 | 208.67.220.220 | Yes | Yes / No | No (Sydney nearest) | Free; ~NZ$33/yr VIP for stats |
| NextDNS | Custom | Custom | Configurable | Yes / Yes | No (Sydney nearest) | Free to 300k queries/mo; ~NZ$33/yr |
| Cloudflare Family (1.1.1.3) | 1.1.1.3 | 1.0.0.3 | No (24h purge) | Yes / Yes | Yes (Auckland) | Free |
For most NZ households, Google Public DNS and Cloudflare’s 1.1.1.1 are the safe, fast defaults thanks to their Auckland presence. If you want malware blocking built in without query logging, Quad9 is the pick. And if you want per-device filtering, custom blocklists and query analytics, NextDNS at roughly NZ$33 a year is effectively a managed DNS firewall for your home network.
DNS vs VPN: what changing DNS will not do
Changing your router’s DNS is not the same as running a VPN, and the distinction matters. A DNS change affects only where your domain lookups are resolved. It does not encrypt your traffic, hide your IP address or route your data through another country. If your aim is to reach content that is geo-restricted to another region, or to stop your ISP seeing your traffic at the packet level, a DNS change alone will not do it.
A VPN encrypts all traffic leaving your device and routes it through a server elsewhere. Some providers also sell Smart DNS as a separate product, which changes only the DNS resolution used for geo-detection — faster for streaming, but with no privacy benefit. If you are weighing full VPN options, our best VPN guide covers router-compatible providers, and there is a free VPN comparison worth reading before you commit to a paid plan.
One practical overlap: if you run a VPN client on the router itself, it usually overrides your WAN DNS and uses the VPN provider’s own resolvers to prevent leaks. Check your provider’s documentation to see whether your custom DNS will be respected or bypassed.
Common mistakes to avoid
- Changing DNS on one device only. Set it on the router and everything on the network is covered; set it on a single laptop and every other device still uses your ISP’s resolver.
- Leaving the secondary field blank. If your primary resolver goes down and there is no secondary, lookups fail until it recovers. Always fill in both.
- Assuming a DNS change equals privacy. Plain DNS on port 53 is still visible to your ISP even when it points at Cloudflare — they cannot read the answer, but they can see you are querying a resolver. Real in-transit protection needs DoH or DoT, which most consumer routers do not support natively; for that you need firmware like OpenWrt, or a device such as a Raspberry Pi running Pi-hole with an encrypted upstream.
- Not testing after the change. DNS caching means devices may keep using old answers for a while. Flush the cache, then re-test — our flush DNS guide has the commands for every platform.
- Using a far-away resolver. Some guides push obscure “privacy” resolvers hosted in Europe; from New Zealand those queries can travel 270 ms each way, a noticeable regression in browsing feel. Stick to resolvers with Auckland or Sydney infrastructure.
- Overlooking IPv6 DNS. Chorus fibre carries IPv6, and most Spark and One NZ plans pass it through. If you set IPv4 DNS manually but leave IPv6 on automatic, some queries still go through your ISP. Cloudflare’s IPv6 addresses are 2606:4700:4700::1111 and 2606:4700:4700::1001.
Bottom line
Changing the DNS on your router is one of the simplest network tweaks you can make, and for NZ households it delivers real, if modest, benefits: faster lookups from resolvers with local infrastructure, less ISP visibility into your browsing, and optional network-wide filtering without touching individual devices. It takes under five minutes on any mainstream router, including the ISP modems common on Spark, One NZ and 2degrees plans. Cloudflare’s 1.1.1.1 is a sensible default — Auckland PoP, a credible no-logging stance and free — while NextDNS at about NZ$33 a year adds control that goes well beyond any free resolver. What a DNS change will not do is replace a VPN: if you need encryption, IP masking or access to overseas streaming libraries, that is a separate job, and a router that supports VPN clients is the place to start.
Sources
Frequently asked questions
Will changing my router’s DNS make my internet faster?
It can, but the gains are modest and depend on your current resolver. On an Auckland Chorus fibre line, switching from a slow ISP resolver to Cloudflare or Google — both with Auckland PoPs — can cut lookup times from 20–40 ms to under 5 ms. That does not change your download speed, but it can make browsing feel snappier because every new connection begins with a DNS lookup. On a Hyperfibre line where throughput is already excellent, DNS latency is often the last remaining bottleneck for how fast pages start loading.
Is it legal to change DNS in New Zealand?
Yes, entirely. No provision in the Telecommunications Act, the Privacy Act 2020 or any other New Zealand law restricts which DNS resolver a consumer uses, and ISP terms of service do not prohibit it either. You are simply choosing where your domain queries are answered, which is a standard network setting.
Will this affect streaming TVNZ+, Neon or Sky Sport Now?
No. These services work out your location mainly from your IP address, not your DNS resolver. Switching to Cloudflare or Google DNS will not make them think you are overseas, and it will not unlock overseas libraries. For that you would need a VPN or a Smart DNS service that proxies your traffic through a server in the target country.
My router came from Spark, One NZ or 2degrees — can I still change the DNS?
In most cases, yes. ISP-supplied routers in New Zealand generally allow DNS configuration through the standard admin interface even when other settings are locked. The exception is some managed business services where the ISP keeps full control of the hardware. If the DNS fields are greyed out or missing, set DNS on each device instead, or place your own router behind the ISP device in bridge mode.
What is the difference between changing DNS on the router versus on each device?
Router-level DNS applies to everything that gets its network settings from the router — smart TVs, consoles, IoT gadgets and Wi-Fi guests included — so it is the right choice for most households. Device-level DNS affects only that one device, which is useful when you want a different profile somewhere specific, such as stricter filtering on a child’s tablet.
How do I confirm the change actually worked?
The most reliable check is to visit 1.1.1.1/help in a browser if you set Cloudflare — it confirms whether your queries are reaching Cloudflare. Otherwise, run the extended test at a DNS leak test site, which shows which resolver is handling your queries and where it sits. If you still see your ISP’s resolver, flush the DNS cache on the device you are testing from and try again.


