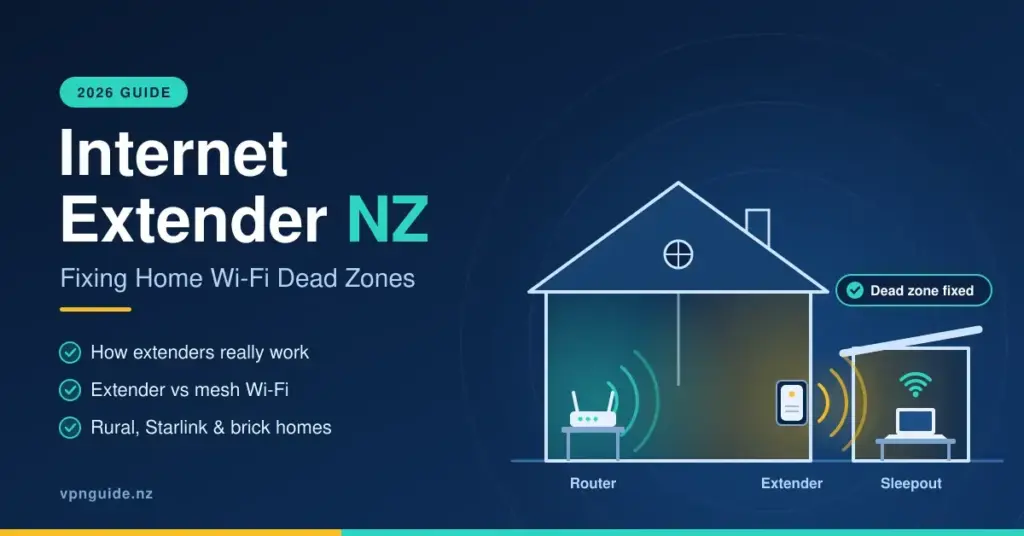
Patchy Wi-Fi is one of the most common household frustrations in New Zealand, and an internet extender is often the cheapest way to fix it. An extender — also called a Wi-Fi booster or repeater — captures the wireless signal from your existing router and rebroadcasts it into the rooms, sleepouts and garages the signal cannot otherwise reach. It will not increase the raw speed your provider delivers to the street, but placed correctly it can turn a frustrating dead zone into a usable connection. This guide explains how extenders actually work, how they differ from mesh Wi-Fi, which hardware suits Kiwi homes in 2026, and how to get the best result from whatever you buy — including advice for rural properties, Starlink users and older brick-and-tile houses.
Key Points
- What it does: An internet extender rebroadcasts your router’s existing Wi-Fi into dead zones — it does not increase your plan’s speed.
- The trade-off: Simple wireless extenders run half-duplex and can roughly halve speed on the extended connection.
- Extender vs mesh: One extender fixes a single dead spot cheaply; a mesh system gives seamless whole-home coverage with automatic roaming.
- Placement matters most: Put it about halfway between the router and the weak area, not inside the dead zone.
- Standard to buy in 2026: Wi-Fi 6 (802.11ax) for most homes; Wi-Fi 7 only if you have Chorus Hyperfibre (2/4/8 Gbps).
- Tricky NZ homes: Concrete, brick and foil insulation may need a Powerline kit or a wired access point instead.
How Wi-Fi extension works in New Zealand homes
The core problem in most NZ homes is the “central router” limitation. Internet providers usually install the modem and router wherever the fibre or copper line enters the house — often a hallway cupboard, the garage or a corner of the lounge. Wi-Fi radiates outward in a rough sphere from that one point, so bedrooms at the far end of the house, a converted garage or an outdoor sleepout end up on the weak edge of the signal.
An extender works like a relay runner. It sits between the router and the weak area, receives the existing signal, and rebroadcasts it further into the property. The catch is that most simple extenders operate in “half-duplex” mode, meaning they cannot receive and send data at the same instant on the same radio band. In practice that can roughly halve the usable speed for any device connected through the extender — a real consideration if you are paying for a fast fibre plan.
That trade-off is manageable if you understand it. A device that only needs 20–30 Mbps for video calls or streaming will be perfectly happy on a halved connection; a gaming PC or a 4K TV that wants the full pipe is better served by a wired link or a mesh system with a dedicated backhaul (the private channel a system reserves for traffic between its own units).
Boosters, repeaters, extenders and access points
NZ retailers use these words almost interchangeably, but they describe slightly different approaches:
- Wi-Fi repeater / booster: A wireless-only device that captures and rebroadcasts the signal. Cheapest and simplest, best for a single stubborn dead spot in a small home.
- Powerline extender: Sends data through your home’s 230V electrical wiring using an adapter in each room, then creates a fresh Wi-Fi hotspot at the far end. Ideal when thick walls block a wireless-only repeater.
- Wireless access point (WAP): Connects back to the router by an Ethernet cable and broadcasts full-speed Wi-Fi with no half-duplex penalty. The professional choice for large or multi-building properties.
- Mesh node: Part of a coordinated whole-home system rather than a bolt-on. Covered in detail below.
Range extenders versus mesh Wi-Fi systems
For most households the real decision is between a cheap single range extender and a more expensive mesh system. A traditional range extender usually broadcasts its own network name (SSID) — often your Wi-Fi name with “_EXT” added — so your phone may cling to a weak signal from the main router even while standing next to the extender. Mesh systems such as TP-Link Deco, Netgear Orbi, eero, or One NZ’s SuperWiFi present a single seamless network across every unit, and your devices hand off automatically to the strongest node as you move around the house.
| Feature | Traditional range extender | Mesh Wi-Fi system |
|---|---|---|
| Network name (SSID) | Often a separate name (e.g. Home_EXT) | One seamless name across all units |
| Roaming | Manual switching between networks | Automatic hand-off between nodes |
| Typical performance | Can halve speed on the wireless hop | Designed for stable whole-home speed |
| Indicative price | ~NZ$40–$250 | ~NZ$300–$1,000+ |
| Scalability | Limited; extra units can clash | Add nodes to cover larger areas |
When mesh is the smarter investment
If you live in a multi-level Christchurch townhouse, a larger Auckland home with more than three bedrooms, or anywhere you run dozens of smart-home gadgets, a mesh system is usually the better long-term buy. Better mesh kits use a tri-band design, reserving a third radio purely for node-to-node traffic so your fibre speed is not sacrificed to keep the units talking. If your goal is a seamless “blanket” of coverage for remote work, 4K video and a house full of devices, mesh delivers what a single extender cannot. A lone extender still makes sense when you have one specific dead spot — a back bedroom or a garage — and a limited budget.
What to look for on the box in 2026
When you are comparing units at PB Tech, Noel Leeming, JB Hi-Fi or Jaycar, focus on the Wi-Fi standard, the number of bands and the Ethernet port speed rather than the marketing headline. The “AX” or “AC” number (for example AX3000) is the combined theoretical maximum across all bands — a rough guide, not a speed you will ever see on one device.
- Dual-band or tri-band: A third band gives mesh nodes a dedicated backhaul so coverage does not cost you speed.
- MU-MIMO: Lets the device talk to several gadgets at once instead of queuing them one by one — useful in busy households.
- Gigabit (or faster) Ethernet: Check the physical port is rated for 1000 Mbps or more if you plan to hard-wire a console or TV.
- WPA3 security: The current Wi-Fi encryption standard; prefer it over the older WPA2 to keep your network locked down.
Wi-Fi 6 versus Wi-Fi 7
In 2026, Wi-Fi 5 (802.11ac) is entry-level, Wi-Fi 6 (802.11ax) is the sensible mainstream choice, and Wi-Fi 7 (802.11be) is the new high end. Wi-Fi 6 improves efficiency and handles crowded networks far better than Wi-Fi 5, which is why it is the standard we recommend for most Kiwi fibre plans. Wi-Fi 7 adds Multi-Link Operation (MLO), which lets a device send and receive across multiple bands at once for lower latency and higher throughput. That only matters if you are on a Chorus Hyperfibre plan — now available in symmetrical 2, 4 and 8 Gbps tiers — and want to move those speeds wirelessly to distant rooms. On a standard fibre plan (Home Fibre 300 was upgraded to about 500/100 Mbps from mid-2025), a good Wi-Fi 6 device is plenty.
Extender and mesh hardware compared
The NZ market is dominated by TP-Link and Netgear, with Amazon’s eero and ISP-supplied mesh kits also common. The table below compares widely available options and their strengths. Prices are indicative and move around; always check current NZ retail pricing before buying.
Comparison
| Device | Type | Wi-Fi standard | Ethernet | Best suited to | Indicative NZ price |
|---|---|---|---|---|---|
| TP-Link RE605X | Wall-plug range extender | Wi-Fi 6 (AX1800) | 1× Gigabit | Budget single-room fix; OneMesh-ready | ~NZ$135 |
| TP-Link RE715X | Wall-plug range extender | Wi-Fi 6 (AX3000) | 1× Gigabit | Faster mid-range extender for a larger area | ~NZ$209 |
| Netgear Nighthawk AX8 (EAX80) | Desktop mesh extender | Wi-Fi 6 (AX6000) | 4× Gigabit | Busy homes with several wired devices | Check retailer |
| eero Pro 7 | Whole-home mesh system | Wi-Fi 7 (tri-band, 6 GHz) | 2× 5 GbE per unit | Large, multi-level or Hyperfibre homes | Check retailer |
| One NZ SuperWiFi (TP-Link Deco) | ISP-supplied mesh add-on | Wi-Fi 6 | Varies by node | One NZ broadband customers wanting managed mesh | $5/month add-on (or included on eligible 24-month plans) |
As a rule of thumb: a wall-plug Wi-Fi 6 extender fixes one or two rooms cheaply; a desktop mesh extender with multiple Ethernet ports suits a home office; and a full Wi-Fi 7 mesh system is aimed at large, multi-level or Hyperfibre homes. If you are a broadband customer of a provider that offers managed mesh, that can be the least fuss of all, since the units come pre-configured and supported.
Getting the placement right
The most common reason an extender “doesn’t work” is poor placement. If you plug it in inside the dead zone, it can only rebroadcast the same weak signal it receives. The sweet spot is roughly halfway between the router and the poorly covered area, where the extender still has a strong link back to the source. Many units include a signal-strength light (typically blue or green for a good link, red for too far) to help you find the right power point.
| Obstacle | Impact on Wi-Fi | What helps |
|---|---|---|
| Concrete or brick walls | Very high | Use a Powerline extender or mesh with a wired backhaul |
| Metal (fridges, cabinets, foil insulation) | High | Keep a clear line of sight between router and extender |
| Mirrors and tiled or glass walls | Moderate | Avoid placing the extender directly behind them |
| Other electronics | Moderate | Keep clear of microwaves, baby monitors and cordless phones |
Structurally difficult Kiwi homes
New Zealand has plenty of older homes with foil-backed insulation or solid internal brick that behave like a “Faraday cage,” absorbing wireless signals before they reach the next room. A purely wireless repeater often struggles in these houses. A Powerline kit, which pushes data through the 230V mains wiring and creates a fresh hotspot at the far socket, can effectively “jump” these walls. For large properties beyond about 350 m², expect to add extra nodes — or run Ethernet to an access point — to keep coverage stable.
Extending Wi-Fi for rural NZ and Starlink
Starlink has transformed connectivity for rural Aotearoa, but the small router in its standard kit was not designed to cover a lifestyle block or working farm. Because the standard kit’s router has no built-in Ethernet port, extending it to a shed or sleepout usually means adding the official Starlink Ethernet Adapter, switching the Starlink router into “bypass” mode, and connecting a capable third-party mesh or access point. Starlink also sells its own mesh node, though the current model is dual-band rather than the latest Wi-Fi 6.
- Third-party mesh (via bypass mode): Gives you Wi-Fi 6/7 range, stronger security and finer control than the bundled router.
- Point-to-point bridge: A pair of antennas creates a dedicated wireless “beam” to a building up to around a kilometre away — ideal for a farm shed.
- Outdoor extenders: Weather-sealed (IP65-rated) units mount on external walls to cover yards, pools and driveways.
- Line of sight: For any bridge kit, a clear path with no trees or buildings between the two antennas is essential.
Bridging to separate buildings
If a sleepout or workshop is more than about 20 metres from the house, a standard mesh node often will not reach it reliably. A point-to-point bridge is usually the most cost-effective answer: one antenna on the house, one on the outbuilding, sharing your single Starlink or fibre account across the whole property with no second monthly subscription.
Step-by-step setup for most NZ extenders
Modern extenders are built for DIY installation and typically use a push-button process. On Spark, One NZ or 2degrees plans the whole thing usually takes under five minutes. If you want more control over your home network afterwards, the same principles apply to a full home Wi-Fi setup.
- Position for pairing: Plug the extender into a power point in the same room as your modem/router for the initial setup.
- Power up: Wait for the status light to settle (often about 60 seconds).
- WPS sync: Press the “WPS” or “Connect” button on the extender, then press the matching button on your router within two minutes.
- Verify the link: After roughly 30 seconds the signal light should turn steady, showing a successful connection.
- Relocate: Unplug the extender and move it to its permanent “halfway” socket — it remembers the settings automatically.
Managing your extender with an app
Buttons are quick, but the companion apps (such as TP-Link Tether or Netgear Nighthawk) give you far more control. You can rename the extended network, see which devices are connected, schedule Wi-Fi “off” hours for children’s rooms, and use a location-assistant feature that reads your phone’s signal to point you to the best power point. Apps also make it easy to update firmware, which is worth doing regularly for security.
Troubleshooting common problems
If your extender connects but everything still feels slow, the cause is often channel congestion — in most NZ suburbs dozens of nearby networks compete on the same frequencies. Dual-band and tri-band units can shift to a less crowded 5 GHz channel to dodge the interference. When in doubt, run a Wi-Fi speed test next to the extender and again near the router to see where the drop-off happens.
| Symptom | Likely cause | Fix to try |
|---|---|---|
| Frequent drop-outs | Interference or distance | Move the extender closer to the router or away from a microwave |
| Wi-Fi but no internet | Failed authentication | Re-pair via WPS or set it up through the web interface |
| Very slow speeds | Weak link back to router | Move the extender until its signal light is blue/green, not red |
| Device won’t connect | SSID confusion | Join the extender’s network (e.g. Home_EXT) if you are not on mesh |
Every extra hop adds a little latency (“ping”). That is invisible for Netflix or general browsing, but it can cause lag in competitive gaming or robotic audio on Teams calls. For those tasks, plug the device into the extender’s Ethernet port where possible — that skips the final wireless hop and steadies the connection. The same wired-first logic applies to devices you need always online, such as home security cameras.
Who an extender suits — and who should look at mesh
An internet extender is the right tool when you have one or two specific dead zones, a modest budget, and a signal that is at least usable partway to the problem area. It is quick to set up, cheap, and easily moved. It is the wrong tool for whole-home coverage in a large or multi-level house, for keeping speed high on a Hyperfibre plan, or for seamless roaming while you walk around — those jobs belong to a mesh system or a wired access point. Match the hardware to the problem and you will avoid buying twice.
Sources
- One NZ — SuperWiFi whole-home mesh
- Chorus — Hyperfibre plans and speeds
- TP-Link — RE715X AX3000 Wi-Fi 6 extender
- TP-Link — RE605X AX1800 Wi-Fi 6 extender
- Netgear — Nighthawk AX8 (EAX80) AX6000 extender
- eero — Pro 7 Wi-Fi 7 mesh (New Zealand)
- Starlink — Ethernet Adapter and third-party router support
- Wi-Fi Alliance — Wi-Fi 7 (802.11be) overview
Frequently Asked Questions (FAQ)
Will an internet extender make my internet faster?
No. An extender only spreads your existing signal into new areas; it cannot raise the speed your provider delivers to the property. It can, however, make a slow, unusable corner of the house genuinely usable.
Where should I place the extender?
Roughly halfway between your router and the dead zone, at a point where the extender still receives a strong signal from the router. If you place it inside the dead zone it can only rebroadcast a weak signal.
Is mesh Wi-Fi better than a range extender?
For large, multi-level or device-heavy homes, yes — mesh gives one seamless network and automatic roaming. For a single problem room on a tight budget, a range extender is often all you need.
Do extenders work through thick concrete or brick walls?
Wireless-only extenders struggle with concrete, brick and foil insulation. In those homes a Powerline kit that uses the mains wiring, or a mesh system with a wired backhaul, is a more reliable choice.
Can I use an extender with Starlink?
Yes, but the standard Starlink kit’s router has no Ethernet port, so you generally add the official Ethernet Adapter, switch to bypass mode, and connect a mesh system or access point — or use a point-to-point bridge to reach a distant building.