Choosing and setting up the right internet modem in New Zealand is the difference between a fibre plan that lives up to its promise and one that quietly wastes the money you pay for it every month. In 2026 the word “modem” covers a surprisingly wide range of hardware, from the small Optical Network Terminal (ONT) bolted to the wall in a fibre home, to the all-in-one modem-router units handed out by Spark, One NZ and 2degrees, to the SIM-based gateways used on fixed wireless plans. This guide explains, in plain language, what each device does, how the pieces fit together on New Zealand’s Ultra-Fast Broadband (UFB) network, and the practical steps that let a Kiwi household get the speed, coverage and security it is actually paying for.
Key Points
- On fibre, the ONT is the real “modem” — the box your ISP supplies is a router that plugs into it.
- Match the hardware to the plan: a single gigabit port maxes out near 940 Mbps, so Hyperfibre needs a 2.5–10 Gbps WAN port.
- Wi-Fi 6 is the 2026 baseline; Wi-Fi 7 adds Multi-Link Operation, 320 MHz channels and 4K-QAM.
- BYO on fibre needs VLAN ID 10 with priority 0 and DHCP/IPoE (or PPPoE on copper VDSL).
- Placement and security are free wins: centralise and elevate the router, enable WPA3, and change the default admin password.
What an Internet Modem Actually Does
A modem — short for modulator-demodulator — is the translator that sits between your home devices and the outside network. It converts the digital data your computer or phone produces into a signal that can travel over external infrastructure, and it converts incoming signals back again. The exact translation depends on the medium: light pulses over fibre-optic glass, electrical frequencies over copper telephone lines, or radio waves over a mobile network. Because those media are so different, the hardware that handles each one is different too, which is the single biggest reason people end up with a device that will not connect.
In a modern New Zealand fibre home the translation is handled by the ONT rather than a box you buy in a shop, so the unit your provider ships is, strictly speaking, a router with Wi-Fi rather than a modem. On copper (VDSL or ADSL) the modem and router are usually combined into a single unit, and on fixed wireless the whole job is done by a self-contained gateway with a built-in SIM. Understanding which category you fall into makes every later decision — buying hardware, troubleshooting a dropout, or bringing your own device — far simpler.
Modem, Router and Gateway: The Terms Untangled
These three words are used loosely by retailers and even by some ISPs, which adds to the confusion. Keeping them straight helps you know exactly what you are looking at when a light turns red or a salesperson quotes you a price.
- Modem: Translates the signal between your home and the network medium (fibre, copper or wireless).
- Router: Shares one internet connection among many devices and creates your local Wi-Fi and wired network. A quality home router is what most fibre users are really shopping for.
- Gateway (modem-router): A single box that combines both jobs — standard for VDSL, ADSL and fixed-wireless plans.
- ONT: The fibre-specific “modem”, installed and owned by the network, that converts light to data for your router.
ONT vs Modem vs Router: The NZ Fibre Hierarchy
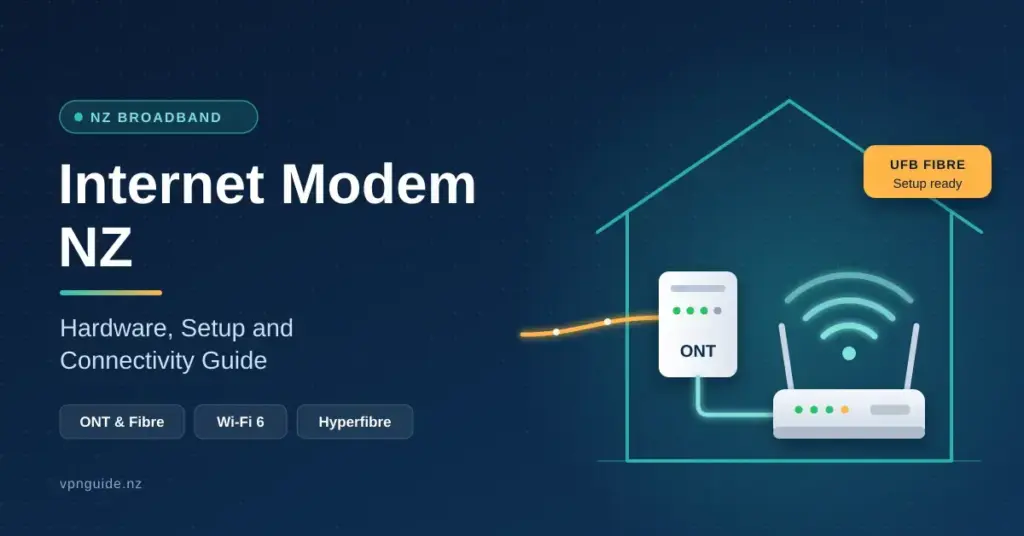
On a fibre-to-the-premises connection — the type most New Zealand households now have — there is a clear chain of hardware, and knowing the order helps enormously when something stops working. The fibre cable from the street enters the ONT; a short Ethernet cable then runs from the ONT’s active port into the WAN (or “Internet”) port of your router; the router finally distributes the connection over Wi-Fi and its LAN ports to your devices.
The key thing to grasp is that the ONT is part of the national network rather than a consumer gadget. It is installed and maintained by a Local Fibre Company (LFC) such as Chorus, Enable, Northpower or Tuatahi First Fibre, and you neither buy it nor replace it. The device you can choose and upgrade is the router that plugs into it. That distinction is what makes “bring your own” hardware possible on fibre, and it is also why a red light on the ONT means something very different from a red light on your router.
The Role of the ONT on UFB Fibre
The ONT usually has one or more ports labelled “GE” or “LAN”, but typically only one is provisioned and active for your plan. When you set up or replace a router, the cable must run from that provisioned port — often GE1 or LAN1 — into the router’s WAN port. A few details are worth knowing before you touch anything:
- The ONT converts incoming light to electrical signals; it is owned and serviced by your LFC, not your ISP.
- Only the provisioned port carries your service; plugging into the wrong port is a common self-inflicted fault.
- Cat5e cable is the practical minimum, but Cat6 is a safer choice for gigabit and multi-gig speeds.
- The ONT needs its own power adapter; if it loses power, no router will bring the connection back.
Matching Hardware to Your NZ Connection Type
New Zealand broadband splits into a handful of connection technologies, and each one expects a particular kind of modem or gateway. Most ISPs bundle a “free” unit with a term contract, but plenty of households buy their own hardware for stronger Wi-Fi, better parental controls or more advanced security. The one big exception is fixed wireless: those gateways contain a SIM locked to the provider’s network, so they generally must come from the ISP. Comparing the plan you are on against the hardware it needs is the fastest way to avoid an expensive mismatch, and it is worth checking against your chosen broadband provider before you buy.
Comparison
| Connection type | What acts as the modem | Recommended hardware | Key setting / note |
|---|---|---|---|
| Fibre up to ~1 Gbps | ONT (owned by the LFC) | Wi-Fi 6 router, gigabit WAN port | VLAN 10, DHCP/IPoE |
| Hyperfibre (2–8 Gbps) | ONT (owned by the LFC) | Wi-Fi 7 router with 2.5–10 Gbps WAN port | Multi-gig port required to exceed ~940 Mbps |
| Fixed wireless (4G/5G) | ISP gateway with built-in SIM | ISP-supplied unit (SIM-locked) | Plug-and-play; placement is the main lever |
| VDSL / ADSL (copper) | DSL modem-router (combined) | VDSL2-capable modem-router | Usually PPPoE authentication |
| Satellite (rural) | Provider dish + router | Supplied kit (e.g. Starlink) | Bypasses fibre and copper entirely |
Fibre and Hyperfibre Hardware
For standard fibre plans up to about 1 Gbps, any router with a gigabit WAN port and Wi-Fi 6 will comfortably deliver the speed. The catch appears once you move to Chorus Hyperfibre, which offers symmetric plans of roughly 2 Gbps, 4 Gbps and 8 Gbps built on an XGS-PON platform capable of up to 10 Gbps. A single “gigabit” Ethernet port is physically capped at around 940 Mbps in the real world — the missing 6% or so is normal protocol overhead, not a fault. To use anything faster than about 940 Mbps you need a router with a multi-gigabit WAN port rated at 2.5 Gbps, 5 Gbps or 10 Gbps. Without that port you are paying for bandwidth your own hardware cannot physically carry.
Fixed Wireless and Rural Options
Fixed wireless broadband uses a 4G or 5G gateway with an embedded SIM, so it is plug-and-play but locked to the provider’s towers. For rural and remote properties beyond the fibre footprint, low-earth-orbit satellite has become a serious alternative: Starlink in New Zealand supplies its own dish and router, bypassing the copper and fibre networks entirely. If you want the wider technical background on how the constellation works, the independently maintained Starlink overview on Wikipedia is a useful primer. On any of these wireless options the hardware is largely fixed, so the gains come from placement rather than swapping the device.
VDSL and ADSL on Copper
Where fibre has not been installed, copper VDSL or ADSL remains in use, though it is steadily being retired. These connections need a DSL-capable modem-router — a fibre router will not work because it lacks the copper DSL port. VDSL is the faster of the two and usually requires PPPoE authentication with a generic username and password, while ADSL is the slower legacy option. If you are moving from copper to fibre, budget for a new router: your old ADSL or VDSL unit cannot connect to an ONT.
Wi-Fi 6 and Wi-Fi 7: Why the Standard Matters
The Wi-Fi standard your hardware supports has as much impact on everyday performance as the plan itself, especially in a home full of phones, TVs, consoles and smart devices. In 2026 the sensible baseline for any new purchase is Wi-Fi 6 (802.11ax); Wi-Fi 7 (802.11be) is the emerging premium tier. Older Wi-Fi 5 gear struggles once a couple of dozen devices are competing for airtime, which shows up as buffering and lag rather than a slow speed-test number.
- Wi-Fi 6 (802.11ax): Handles many simultaneous devices efficiently; the practical minimum for a new modem or router today.
- Wi-Fi 7 (802.11be): Adds Multi-Link Operation (MLO), which sends data across the 2.4 GHz, 5 GHz and 6 GHz bands at once for lower latency and better reliability.
- 320 MHz channels: Wi-Fi 7 doubles the maximum channel width from 160 MHz, giving data wider “lanes” to travel through.
- 4096-QAM (4K-QAM): A denser modulation that lifts theoretical throughput by roughly 20% over Wi-Fi 6’s 1024-QAM under ideal conditions.
It is worth noting that a fast Wi-Fi standard only helps if the wired side keeps up. Spark’s current Smart Modem 3, for example, pairs Wi-Fi 6 with a 2.5 Gbps WAN port — a sensible balance, and a reminder that headline Wi-Fi numbers mean little if the WAN port is a bottleneck.
Setting Up a BYO Modem: VLAN 10 and Authentication
Bringing your own router on fibre is straightforward once you know the two settings New Zealand networks expect. The first and most important is VLAN (Virtual Local Area Network) tagging. Almost every NZ fibre provider requires the WAN connection to be tagged with VLAN ID 10; without it you can have every light green and still have no internet, because the network simply will not recognise untagged traffic. The second is the authentication method, which is usually DHCP (also called Dynamic IP or IPoE) on fibre, or PPPoE on copper VDSL.
Step-by-Step VLAN Configuration
Many current routers from brands such as TP-Link and ASUS include a setup wizard with a “New Zealand” region option that applies the correct tag automatically. If you are configuring it by hand, log in to the router’s admin page (commonly at 192.168.1.1 or 192.168.1.254), open the WAN or Internet settings, and enter these values:
- VLAN ID: 10 (the standard for most NZ UFB connections).
- VLAN priority (802.1p): 0.
- Connection type: DHCP / Dynamic IP / IPoE for fibre.
- Copper VDSL/ADSL: PPPoE, often with a generic username and password from your ISP.
A small number of providers hand out untagged connections on request, and settings can vary, so it is always worth confirming the exact requirements with your own ISP before assuming VLAN 10 applies. If everything is tagged correctly and you still cannot connect, the next suspect is almost always the cable or the ONT port rather than the router.
Getting the Best Speed: Placement and Mesh Wi-Fi
Where you put your router matters more than most people expect — poor placement can cut usable speed dramatically. Wi-Fi travels as high-frequency radio waves that are easily absorbed or reflected by walls, mirrors, water tanks and metal. Many Kiwi homes built with concrete, brick or foil-backed insulation create genuine dead zones where the signal all but disappears. The fix is usually free: move the hardware to a central, elevated, open position rather than hiding it in a cupboard, behind a TV or on the floor.
When to Add Mesh Wi-Fi
In larger or multi-storey homes a single router often cannot cover every room, no matter where you place it. A mesh Wi-Fi system — sold by NZ ISPs under names like “Smart WiFi” or “Whole Home WiFi” — uses several nodes to form one seamless network. Unlike old-style extenders that create a second network name and roughly halve throughput, mesh nodes hand your device between them automatically as you move around the house.
- Centralise: Put the main unit near the middle of the home, not in a corner.
- Elevate: A shelf or wall mount beats sitting on the floor.
- Avoid obstruction: Keep it clear of large metal objects, mirrors and appliances.
- Space nodes sensibly: Place each mesh node within a room or two of the last for a strong backhaul link.
Troubleshooting Common Modem Problems
When the connection drops, the status lights on your ONT and router are the fastest diagnostic tool you have. A red light on the ONT usually signals a physical or line fault that only a technician can resolve, whereas a red light on the router more often points to a software or authentication issue you can fix yourself. Reading the lights before you phone your ISP saves time and often the callout.
The 30-Second Power Cycle
The single most effective home fix is a proper power cycle: unplug the unit, wait about 30 seconds so it fully clears its state, then plug it back in and give it a couple of minutes to re-establish the connection. This clears temporary glitches and refreshes the link to the exchange, and it resolves a large share of everyday dropouts. If a power cycle does not help, the table below shows what the most common ONT symptoms usually mean.
| ONT / router symptom | Likely cause | Recommended action |
|---|---|---|
| No power light | Power-supply failure | Check the wall socket and the ONT’s power lead. |
| Red optical / LOS light | Physical fibre-line fault | Contact your ISP to log a fault with the LFC. |
| No LAN / GE light | Cable or wrong-port issue | Reseat the Ethernet cable in the provisioned ONT port. |
| Red internet light (router) | Authentication failure | Power-cycle the router; check for an ISP outage. |
Securing Your Home Gateway
Your modem-router is the front door to everything on your home network, which makes it a natural target. A few simple habits close the most common gaps without any special expertise. Enable WPA3 encryption if your hardware supports it (WPA2 otherwise), turn off WPS “push-button” pairing because it has known weaknesses, and keep the firmware up to date so security patches are actually applied. Changing the DNS your router hands out can also improve privacy and blocking; our guide on how to change DNS on your router walks through the steps.
- Passwords: Set a strong, unique key for the Wi-Fi and a separate one for the admin login.
- Guest network: Put smart-home (IoT) gadgets on a separate guest SSID, away from your computers.
- Firmware: Check for updates periodically, or enable automatic updates where offered.
- WPS off: Disable push-button pairing to stop nearby devices joining without permission.
Change the Default Admin Login
The most common oversight in New Zealand homes is leaving the router’s admin password at its factory default, often something like “admin” or “password”. Even with a strong Wi-Fi key, anyone already on the network could open the admin panel and change settings or watch traffic. Change both the Wi-Fi key and the administrative login the first time you set up the device. New Zealand’s National Cyber Security Centre (NCSC) and Netsafe both publish current advice on securing home connections, and reviewing it is a worthwhile habit as scams grow more sophisticated.
ISP-Supplied vs Buy-Your-Own Hardware
Deciding between the “free” ISP unit and your own gear is a trade-off between convenience and control. Lease the ISP’s modem and you get remote support and automatic firmware updates, with the provider responsible if it fails. Buy your own and you gain stronger Wi-Fi, more advanced settings and independence from contract hardware — but you also own the troubleshooting if something breaks or a future network change needs new configuration. Third-party brands are easy to find at retailers like PB Tech and JB Hi-Fi, and there is a model for every budget.
| Brand | Typical NZ models | Best known for |
|---|---|---|
| TP-Link | Deco mesh, Archer series | Value and easy mesh systems |
| ASUS | RT-AX series, ROG Rapture | Gaming features and fine-grained control |
| Netgear | Nighthawk, Orbi | High-end performance and coverage |
| ISP-branded | Spark Smart Modem 3, One NZ WiFi units | Simplicity and bundled support |
What to Look for When Buying
If you do buy your own router, four features matter most for a New Zealand fibre home: Wi-Fi 6 as a minimum (Wi-Fi 7 if budget allows), a WAN port fast enough for your plan (multi-gig for Hyperfibre), support for VLAN tagging so it will work on UFB, and WPA3 security. For coverage, decide up front whether a single router or a mesh kit suits your floor plan — adding nodes later usually works best when they are from the same range. If your existing plan already keeps up with your household, upgrading the router alone often delivers a bigger real-world improvement than changing providers, and pairing it with a well-configured Wi-Fi setup can make an ISP’s own hardware perform noticeably better.
Future Trends: Multi-Gig Ports and 5G Failover
Two shifts are reshaping New Zealand modems. The first is multi-gigabit wired ports becoming standard, driven by Hyperfibre and Wi-Fi 7. The second is “always connected” hybrid hardware: units that pair fibre with a built-in 4G or 5G chip and switch automatically to mobile if the fibre line is cut — something that happens more often than you might think during roadworks and storms. Together they point toward a home connection that is both faster and far harder to knock offline.
- Multi-Link Operation (MLO): Wi-Fi 7 uses several bands at once to cut lag from interference.
- 4K-QAM and 320 MHz channels: Higher data density and wider channels for greater throughput.
- Mobile failover: A built-in 5G SIM keeps the home online while a fibre fault is repaired.
- Multi-gig ports: 2.5 Gbps and 10 Gbps WAN/LAN ports move from premium to mainstream.
For most households the practical takeaway is simple: a modem that is modern, secure and well placed is the cheapest and most effective upgrade you can make to your connection. Match the hardware to your plan, tag the WAN correctly, lock down the admin login, and the fibre you already pay for will finally perform the way it was sold to you.
Sources
- Chorus — Hyperfibre plans and speeds
- Spark — Smart Modem 3 support and specifications
- Netgear — Setting up a router on Spark NZ Fibre / UFB (VLAN 10)
- Netgear — Wi-Fi 7 (802.11be) enhancements: MLO, 320 MHz, 4K-QAM
- Consumer NZ — Wi-Fi routers and mesh networks
- National Cyber Security Centre (NCSC) New Zealand
- Netsafe — Reporting scams and online safety
Frequently Asked Questions
What is the difference between a modem and an ONT in New Zealand?
On a fibre connection the Optical Network Terminal (ONT) on your wall acts as the modem, converting light signals into data. The box your ISP supplies is technically a router that shares that data over Wi-Fi and Ethernet. On copper or fixed wireless, the modem and router are usually combined in one unit.
Can I use my own modem with any NZ internet provider?
Usually yes for fibre and copper, provided your router supports VLAN tagging (normally ID 10) and DHCP/IPoE or PPPoE. Fixed wireless is the exception: those gateways contain a SIM locked to the provider, so you generally must use the ISP’s own hardware. Always confirm the exact settings with your provider.
Why is my internet slow even though I have a gigabit plan?
The most common causes are a router or port limited to Fast Ethernet (capped at 100 Mbps), Wi-Fi interference, or simply the ~940 Mbps real-world ceiling of a single gigabit port after protocol overhead. Check that devices connect via a gigabit or multi-gig port and that your Wi-Fi standard is at least Wi-Fi 6.
Do I need a new modem for Hyperfibre?
Yes. To reach speeds above about 940 Mbps you need a router with a multi-gigabit WAN port — 2.5 Gbps, 5 Gbps or 10 Gbps depending on your Hyperfibre plan. A standard gigabit router will physically limit even a 2 Gbps plan to under 1 Gbps.
What does a red light on my fibre box mean?
A red optical or LOS (Loss of Signal) light on the ONT usually means a physical break in the fibre or a fault at the exchange, which needs a technician — contact your ISP to log a fault with the local fibre company. A red light on the router is more often an authentication or software issue that a power cycle can fix.