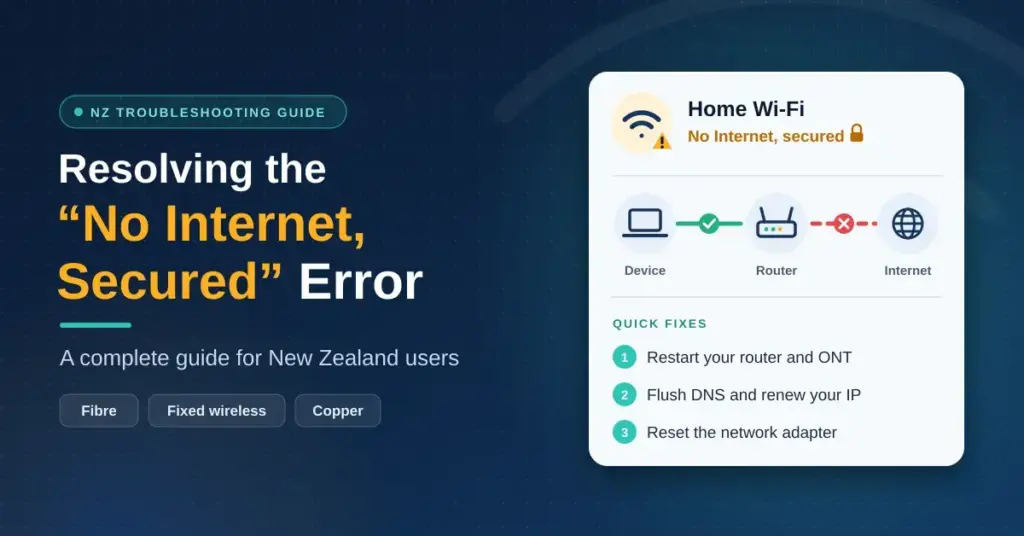
Few things are as annoying as seeing your Wi-Fi icon paired with the words "No Internet, Secured." Your device insists it is connected, yet web pages refuse to load and apps time out. For New Zealand households on fibre, fixed wireless or copper, this message almost always points to a small software or network hiccup rather than broken hardware — and most cases clear within a few minutes once you know where to look. This guide explains what the message actually means, why it appears, and how to work through the fixes in a sensible order, with steps tailored to Kiwi connections that run through home routers and the national Chorus network.
Key Points
- "Secured" means your Wi-Fi link is encrypted and working; "No Internet" means Windows could not confirm a path to the web.
- Windows decides this with a background probe (NCSI) to Microsoft’s test servers — if the probe fails, the warning can appear even when some things still work.
- Common Kiwi causes: a Chorus or ISP outage, a stale IP address, a VPN kill switch, DNS trouble, or an outdated Wi-Fi driver.
- Work from simplest to hardest: check other devices and outages, power cycle your ONT and router, then refresh network settings.
- Only disable IPv6 as a temporary test — Microsoft recommends leaving it on.
- Most cases are fixed on your own device within ten minutes; a red ONT light usually means a line fault for your provider.
What "No Internet, Secured" actually means
The message is really two separate statements joined together. "Secured" confirms that your Wi-Fi password was accepted and the link between your device and the router is encrypted with WPA2 or WPA3, so your local connection is safe. "No Internet" is a second, independent verdict: Windows ran a background check and could not confirm a working path to the wider web.
That background check is handled by a Windows feature called the Network Connectivity Status Indicator, or NCSI. Each time you connect, NCSI quietly requests a tiny test file from Microsoft at www.msftconnecttest.com/connecttest.txt and performs a DNS lookup for dns.msftncsi.com. If the expected replies come back, Windows shows full connectivity. If either probe fails — even when the rest of the internet is actually reachable — Windows displays "No Internet, Secured." This is why the warning sometimes appears while a few apps keep working: the probe, not your whole connection, is what failed.
In plain terms, your laptop is talking to the router, but the conversation stops there. The fault sits somewhere between your device and the internet — in Windows settings, in your home hardware, or occasionally with your broadband provider.
Common causes in New Zealand homes
Working out the likely cause first saves you from running fixes you do not need.
| Cause type | Example in a Kiwi home | Where to start |
|---|---|---|
| Provider or line fault | A Chorus fibre fault or a Spark, One NZ or 2degrees outage in your suburb | Check your ISP status page and the Chorus outage map |
| IP address glitch | Your PC holds a stale or duplicate address after sleep or an update | Release and renew the IP from Command Prompt |
| Software block | A VPN kill switch or security suite is blocking traffic | Close the VPN and test with the firewall paused |
| Driver or adapter fault | An outdated Intel, Realtek or MediaTek Wi-Fi driver | Update the driver in Device Manager |
| DNS problem | Your provider’s DNS servers are slow or unreachable | Switch to a reliable public DNS |
Start here: three quick checks
Before you change any settings, spend two minutes ruling out the obvious. These checks tell you whether the problem is your one device or the whole house.
- Test another device. If your phone, tablet and smart TV are all offline too, the fault is with the network or your provider, not your PC. Our guide to checking for a Chorus outage in your area walks through the status pages worth watching.
- Look for a known outage. Open your provider’s outage page on mobile data and check the Chorus outage map. New Zealand saw several large Chorus fibre faults and ISP outages during 2026, so a regional problem is always worth ruling out early.
- Check your signal. A very weak Wi-Fi signal can starve the NCSI probe of data and trigger the message even when the connection is technically alive. Move closer to the router and see if the warning clears.
Power cycle your modem, router and ONT
If the whole house is affected, the most effective first step is a full hardware restart. This clears the router’s memory and forces a fresh "handshake" with the New Zealand broadband network. On fibre it is not enough to restart the router alone — the Optical Network Terminal (ONT), the small box where the fibre enters your home, needs cycling too so it starts a clean session with your provider.
How to power cycle a New Zealand fibre setup
- Switch off your modem or router at the wall.
- Switch off the ONT (the white box on the wall where the fibre arrives).
- Wait at least 60 seconds so any stored power drains and your provider registers the session as closed.
- Turn the ONT back on first and wait for its lights — especially the optical or "PON" light — to settle to a steady green.
- Turn the router on and give it two to three minutes until the internet light is solid.
- Restart your PC and check whether the message has cleared.
If the ONT’s optical light stays red or keeps blinking after this, that usually signals a physical line fault that only your provider and Chorus can repair.
Refresh your network settings from Command Prompt
If a restart does not help, the problem often sits in your PC’s stored network data, known as the IP stack. Windows can cling to an old address or a corrupted configuration, which leaves the device talking to the router but unable to reach the web. A short series of commands forces your PC to drop that stale data and request fresh settings.
Open the Start menu, type cmd, right-click Command Prompt and choose Run as administrator. Enter these one at a time, pressing Enter after each:
- ipconfig /release — lets go of your current IP address.
- ipconfig /renew — asks the router for a fresh address.
- ipconfig /flushdns — clears the local store of website addresses; our flush DNS guide explains why this helps.
- netsh winsock reset — restores the Windows "Winsock" component that manages network data.
- netsh int ip reset — resets the TCP/IP stack to its defaults.
Restart your PC after the last command so the changes take effect.
When these commands help most
- After a Windows update that leaves Wi-Fi broken.
- When other devices work fine but one PC refuses to connect.
- After uninstalling a VPN or third-party antivirus that left virtual adapters behind.
Should you disable IPv6? Proceed with caution
A widely shared tip is to switch off IPv6, the newer internet addressing system, so Windows falls back to the older IPv4. On a small number of networks this does clear the message. However, it is important to be accurate here: Microsoft does not recommend permanently disabling IPv6, because several Windows features are built to expect it and may stop working properly without it. Microsoft’s own preferred approach is to leave IPv6 enabled and adjust address-preference settings instead.
Treat turning IPv6 off as a temporary test only. If it fixes the problem, you have learned the issue is IPv6-related — the real fix is usually a router firmware update — and you should switch IPv6 back on afterwards.
How to toggle IPv6 off for a quick test
- Right-click the Wi-Fi icon in the taskbar and open Network and internet settings.
- Go to Advanced network settings, then More network adapter options.
- Right-click your active Wi-Fi adapter and choose Properties.
- Find Internet Protocol Version 6 (TCP/IPv6) in the list and untick the box, then click OK.
- Toggle Wi-Fi off and on, then test your connection.
- If it does not help, re-tick the box straight away to return to a supported configuration.
Rule out VPN and antivirus interference
VPNs are popular in New Zealand for privacy and streaming, but they are a common trigger for this error. If a VPN’s kill switch is enabled and the app crashes or loses its server, it will deliberately block all traffic to prevent data leaking — which Windows reads as "No Internet." Third-party security suites can cause the same effect if a firewall update flags your local network as untrusted.
| Software | What can go wrong | How to test it |
|---|---|---|
| VPN | Kill switch is blocking all traffic | Disconnect and fully quit the VPN app, then retest |
| Antivirus / firewall | Firewall is blocking the local gateway or the NCSI probe | Pause the firewall briefly to test, then turn it back on |
| Proxy settings | A manual proxy is set incorrectly | Check Settings > Network & internet > Proxy and turn manual proxy off |
Managing VPN conflicts
If a VPN is the culprit, update it to the latest version or switch the connection protocol in its settings — moving between WireGuard and OpenVPN often resolves stubborn conflicts. If the trouble continues, a full Windows network reset will clear any leftover virtual adapters the VPN created.
Try a different DNS server
If your device connects to the router but the web still will not load, the Domain Name System (DNS) may be at fault. DNS is the service that translates a name like google.co.nz into the numeric address your device actually dials. When your provider’s DNS servers are slow or unreachable, pages fail to open even though the connection is live. Pointing your PC at a well-run public DNS is a safe, reversible fix, and many of these services support DNS Security Extensions (DNSSEC), which help verify that the answers you receive have not been tampered with.
| Service | Primary | Secondary |
|---|---|---|
| Cloudflare | 1.1.1.1 | 1.0.0.1 |
| Google Public DNS | 8.8.8.8 | 8.8.4.4 |
| Quad9 | 9.9.9.9 | 149.112.112.112 |
| OpenDNS | 208.67.222.222 | 208.67.220.220 |
How to set DNS manually
- Open your Wi-Fi adapter Properties, as in the IPv6 steps above.
- Select Internet Protocol Version 4 (TCP/IPv4) and click Properties.
- Choose "Use the following DNS server addresses."
- Enter a primary and secondary address from the table.
- Click OK and restart your browser.
Prefer to fix it once for every device in the house? You can set the same servers on your router instead — see our guide on how to change DNS on your router.
Use the built-in Windows network troubleshooter
Windows can diagnose and repair many connection faults automatically, resetting adapters and restarting services such as WLAN AutoConfig. Note that the tool has moved recently: in Windows 11 version 24H2 and later, Microsoft retired the old Control Panel troubleshooters, and the network troubleshooter now runs through the Get Help app.
- Windows 11 (24H2 and later): open the Get Help app from the Start menu, search for "network" and run the guided network troubleshooter.
- Windows 11 (earlier builds): Settings > System > Troubleshoot > Other troubleshooters, then run Network and Internet.
- Windows 10: Settings > Update & Security > Troubleshoot > Additional troubleshooters > Internet Connections.
Update or reinstall your Wi-Fi driver
If the message keeps returning on one device — especially after a Windows update — an outdated or corrupted Wi-Fi driver is a likely cause. The driver is the small piece of software that lets Windows talk to your laptop’s wireless card, and a bad version can make the connection drop in and out or fail the NCSI probe.
- Right-click the Start button and open Device Manager.
- Expand Network adapters and find your wireless adapter (names usually include Intel, Realtek, Qualcomm, Broadcom or MediaTek).
- Right-click it and choose Update driver, then Search automatically for drivers.
- If that reports no change, right-click the adapter again and choose Uninstall device, then restart your PC — Windows reinstalls a fresh copy on boot.
For the most reliable result, download the latest driver directly from your laptop maker’s support site rather than relying on third-party "driver updater" tools, which can install the wrong version.
Last resort: a full network reset
If nothing above works, a network reset is the final software option. It removes every Wi-Fi adapter and reinstalls it, returning all networking components to their defaults. It will not touch your personal files, but you will need to re-enter saved Wi-Fi passwords and reconfigure any VPN afterwards, so have those details ready.
- Go to Settings > Network & internet.
- Open Advanced network settings (Windows 11) or Status (Windows 10).
- Select Network reset.
- Click Reset now and confirm.
- Your PC restarts shortly afterwards and rebuilds its network setup.
When to contact your provider or a technician
Most "No Internet, Secured" cases are solved on your own device. Reach out for help when the signs point to hardware or the line rather than Windows:
- The ONT’s optical light is red or flashing — a physical fibre fault your provider must log with Chorus.
- Every device in the house is offline and there is no reported outage.
- The fault returns constantly on one device even after a network reset, which can indicate a failing Wi-Fi card or driver.
Knowing who does what helps here: your retail provider handles your account and modem, while Chorus maintains most of the physical network. Our overview of how the New Zealand provider market works explains where responsibility sits when you lodge a fault.
Fix Checklist
- Check whether other devices are online and whether your ISP or the Chorus map reports an outage.
- Power cycle the ONT first, then the router, then restart your PC.
- Run the Command Prompt sequence: release, renew, flush DNS, Winsock reset, IP reset.
- Disconnect and fully quit any VPN; briefly pause the firewall to test.
- Switch to a public DNS such as Cloudflare (1.1.1.1) or Google (8.8.8.8).
- Run the built-in network troubleshooter (Get Help app on Windows 11 24H2 and later).
- If it still fails, perform a full network reset — have your Wi-Fi password ready.
- Persistent faults or a red ONT light: contact your provider to log a line fault.
Sources
- Microsoft — Network Connectivity Status Indicator (NCSI) frequently asked questions
- Microsoft — Guidance for configuring IPv6 in Windows for advanced users
- Microsoft — Fix network connection issues in Windows
- Chorus — Network outages and status
- Cloudflare — 1.1.1.1 public DNS resolver
- Google — Google Public DNS documentation
Frequently asked questions
What does "No Internet, Secured" actually mean?
Your PC is connected to the router and the link is encrypted (that is the "Secured" part), but Windows could not confirm a working path to the internet when it ran its background connectivity check, so it shows "No Internet."
Why is only one device in my home showing the message?
When a single device is affected and everything else works, the cause is almost always that device’s own settings, drivers or software — such as a VPN or firewall — rather than a problem with your provider.
Is it safe to disable IPv6 to fix this?
Only as a temporary test. Microsoft advises against permanently turning off IPv6 because some Windows features rely on it. If disabling it helps, switch it back on afterwards and look for a router firmware update as the real fix.
Can a weak Wi-Fi signal cause this error?
Yes. If the signal is too weak to carry data reliably, Windows’ connectivity probe can fail and report "No Internet" even though you are technically associated with the network. Moving closer to the router often clears it.
Will a network reset delete my files?
No. A network reset only returns your networking settings to default and removes saved Wi-Fi passwords and VPN profiles. Your documents, photos and other personal files are untouched.
How do I check whether there is a Spark, One NZ or 2degrees outage?
Open your provider’s official status or outage page using mobile data, and check the Chorus outage map for your address. If a fault is listed for your suburb, the problem is on the network and you simply have to wait for the repair.