When the internet goes down at home, the fastest way back online is a calm, ordered repair routine rather than random button-pressing. Most faults in a New Zealand household fall into a handful of predictable categories: a single device that has lost its settings, a router or fibre box that needs a proper restart, a line fault upstream on the Chorus network, or a software glitch on the computer itself. This guide walks through those fixes in the order a technician would try them, so you can restore service without a long wait in a support queue. If you want a broader look at what causes drop-outs in the first place, our companion guide on internet not working in New Zealand covers the diagnosis side in more detail.
Key Points
- Triage first: work out whether one device or the whole house is offline before changing anything.
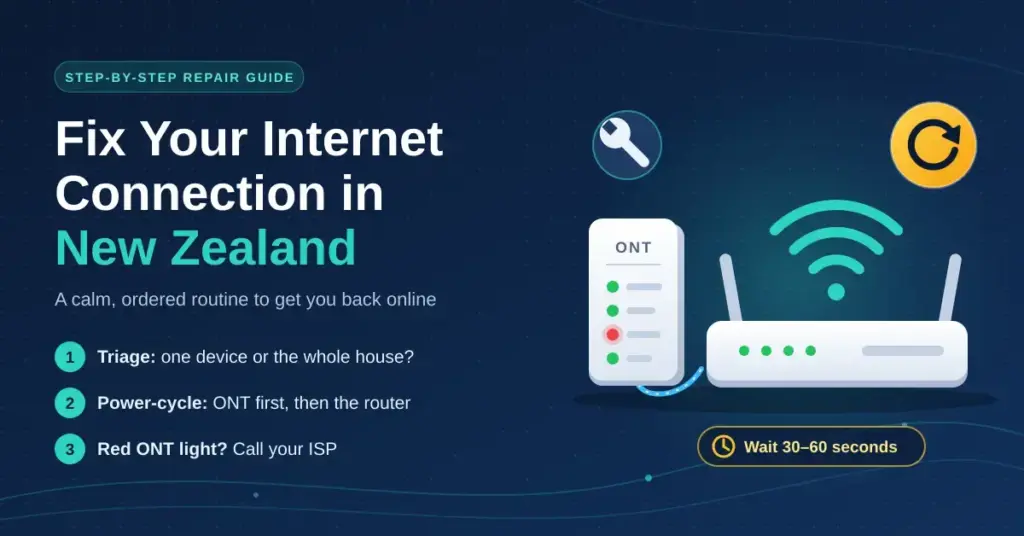
- Power-cycle in order: ONT first, then the router, with a 30–60 second wait between unplugging and powering back on.
- Red ONT light = call your ISP: a red Optical/LOS light is a line fault you cannot fix at home.
- Check outages on mobile data: your fibre wholesaler’s status page confirms whether the problem is yours to fix.
- DNS fixes are for name lookups only: if a ping to 8.8.8.8 fails, the problem is the connection, not DNS.
Start With Triage: How Big Is the Problem?
Before touching any cables, work out how widespread the fault is. This single step decides everything that follows. If one device cannot get online but others can, the problem is on that device. If every phone, tablet and laptop in the house shows “No Internet”, the fault is further upstream — your router, the fibre box (ONT), or your provider’s network.
- Test several devices: try a phone, a tablet and a computer. If only one fails, you can skip straight to the device-level fixes later in this guide.
- Check the Wi-Fi icon: a symbol that is “searching” or shows an exclamation mark means the device sees a network but cannot pass data.
- Try a wired connection: plug a laptop directly into the router with an Ethernet cable. If the wired connection works but Wi-Fi does not, you have a Wi-Fi problem, not an internet problem.
- Confirm which network you are on: phones sometimes latch onto a neighbour’s open network or a public hotspot that has no working connection.
Use the summary below to point yourself at the right fix.
| Symptom | Likely source | First move |
|---|---|---|
| One device fails, others work | That device | Restart it; forget and rejoin the Wi-Fi |
| Wi-Fi visible but no data on any device | Router or ISP | Power-cycle the hardware; check for an outage |
| Red light on the fibre box (ONT) | The fibre line | Log a fault with your ISP |
| No Wi-Fi network appears at all | Router hardware | Check the router’s power and Wi-Fi (WLAN) button |
Step 1: Power-Cycle the ONT and Router in the Right Order
A proper restart clears the internal memory of your equipment and forces a fresh connection to the network. The order matters: the fibre box (ONT) has to establish its optical link before the router tries to connect through it.
- Turn off the power at the wall for both the router and the ONT (the small box usually mounted on a wall).
- Unplug the power cable from each unit and wait 30 to 60 seconds so any stored charge clears.
- Plug the ONT back in first. Wait for the Optical or PON light to settle to a steady green — this can take a couple of minutes.
- Once the ONT is stable, power on the router and wait three to five minutes for all its lights to settle.
- Test a device. If it still fails, move on to reading the ONT lights.
If your connection drops repeatedly and only a daily restart keeps it alive, that is a sign of ageing hardware rather than a one-off glitch — see the resilience section below and our guide to choosing an internet router for your NZ home.
Step 2: Read the Lights on Your Chorus ONT
If a restart does not help, the fibre box tells you where the fault is. The Optical Network Terminal (ONT) is the unit that converts the light signal from the street into a connection your router can use. A red light here almost always means the fault is outside your home and cannot be fixed by the homeowner.
- Optical / PON red: “Loss of Signal” (LOS) — the ONT is not receiving light from the network. First re-seat the thin fibre lead and restart the ONT; if it stays red, log a fault with your ISP so a Chorus technician can be dispatched.
- Optical / PON green (steady or gently flashing): normal — the fibre line is healthy and carrying data.
- Alarm red: the ONT hardware has faulted and usually needs replacing by Chorus.
- LAN / GE port off: the cable between the ONT and your router is loose or faulty — reseat it or try a different Ethernet cable.
- Update light active: a firmware update is running — do not cut the power until it finishes.
A red LOS light is genuinely useful information: it tells you to stop troubleshooting your own gear and report a line fault instead of spending an hour resetting a router that is working perfectly.
Step 3: Check Whether It Is an Outage, Not Your Gear
Before deeper fixes, confirm the problem is actually yours to fix. New Zealand’s fibre wholesalers publish live status maps that are refreshed regularly (roughly every few minutes). The catch is that you need another connection to reach them — use your phone’s mobile data (4G/5G) rather than the Wi-Fi that is down.
- Chorus network status: the main source for fibre and copper faults across most of the country.
- Your ISP’s status page or app: useful for problems specific to your provider’s own systems rather than the wholesale line.
- Local community groups: neighbourhood Facebook or Reddit threads often confirm a street-level outage within minutes.
Which wholesaler runs your line depends on where you live:
| Region | Fibre wholesaler to check |
|---|---|
| Most of New Zealand | Chorus |
| Christchurch | Enable Networks |
| Hamilton, Tauranga, New Plymouth, Whanganui and central North Island towns | Tuatahi First Fibre |
| Whangarei | Northpower Fibre |
| Wireless / rural broadband | Your mobile provider’s network status page |
If a wider outage is confirmed, there is nothing to fix at home — our overview of internet outages in New Zealand explains what to expect while crews restore service.
First-Response Checklist
- Test a phone, tablet and laptop to see how widespread the fault is.
- Try a wired Ethernet connection to rule out Wi-Fi.
- Power-cycle the ONT, then the router, in that order.
- Read the ONT lights — a red Optical/LOS light means log a fault.
- Check your wholesaler’s outage map using mobile data.
- Flush DNS or switch to 1.1.1.1 / 8.8.8.8 if pages will not load.
- Run your ISP’s app-based connection check before calling support.
Step 4: Fix Wi-Fi That Works in Some Rooms but Not Others
If the connection is fine near the router but drops in the bedroom or garage, you have a Wi-Fi coverage problem, not a broken internet connection. In denser suburbs, dozens of nearby routers compete for the same radio channels, and ordinary household objects block the signal.
- Position the router well: keep it central, up off the floor and out in the open, away from other electronics.
- Watch for signal blockers: water cylinders, large mirrors, metal cabinets and masonry all absorb or reflect Wi-Fi.
- Choose the right band: the 5GHz band is faster but struggles through walls; the 2.4GHz band reaches further at lower speeds.
- Avoid the microwave: a running microwave leaks 2.4GHz interference that can briefly disrupt nearby devices.
- Change the channel: a free Wi-Fi analyser app shows congested channels so you can pick a clearer one in your router settings.
If no amount of repositioning covers the whole house, extra hardware is the real fix. A mesh Wi-Fi system spreads coverage across several units and usually beats a single router in larger or multi-storey homes.
Step 5: Repair Software and DNS Faults
Sometimes the hardware is fine but the computer cannot translate website names into addresses, so pages fail to load even though the connection is live. DNS (the “Domain Name System”) is the internet’s address book; when its stored data is stale or corrupted, sites appear to be down when they are not.
- Clear the DNS cache: flushing old address data often fixes pages that will not open. Our step-by-step guide to flushing DNS covers Windows, Mac and mobile.
- Run the built-in troubleshooter: Windows’ Network Troubleshooter (in Settings > Network & Internet) can auto-repair common software faults.
- Try public DNS servers: switching to Cloudflare (1.1.1.1) or Google (8.8.8.8) can sidestep a slow or misbehaving ISP resolver. Here is how to change DNS on your router so every device benefits.
- Forget and rejoin the network: on a phone, removing the saved Wi-Fi and reconnecting clears authentication errors.
- Check for a stalled update: a device midway through a major OS update may have networking temporarily disabled.
| Tool | What it checks | Where to run it (Windows) |
|---|---|---|
| Ping test | Raw connectivity to the internet | Type ping 8.8.8.8 in Command Prompt |
| Network Troubleshooter | Auto-fixes common software faults | Settings > Network & Internet |
| Flush DNS | Clears stale address data | Type ipconfig /flushdns in Command Prompt |
| WLAN AutoConfig | Restarts Wi-Fi services | Services (services.msc) |
Changing DNS or flushing the cache only helps with name-lookup problems. If a ping to 8.8.8.8 fails completely, the issue is your connection or hardware, not DNS.
Step 6: Use Your Provider’s Self-Service Tools
New Zealand’s major providers now offer app-based checks that can test the line from the exchange to your modem without a phone call. These often spot a fault — or confirm your gear is fine — faster than a support queue can.
- Spark: the Spark app and MySpark include a “Check Connection” / Fix My Broadband tool that tests from the Spark network to your modem and can book a technician if it finds a fault.
- One NZ: the My One NZ app shows real-time network status and lets you report a fault.
- 2degrees: the 2degrees Wi-Fi AI Assistant app walks you through personalised troubleshooting and can pass your session to a support specialist.
- Other ISPs: most providers publish a status page and a support line; keep your account number handy before you call.
Step 7: Inspect Cables and Power Adapters
If every software fix fails, check the physical hardware. The thin fibre patch lead between the ONT and your router is fragile — pets chew it and furniture crushes it — and it cannot be repaired at home because it carries glass filaments that must be perfectly aligned. A damaged fibre lead needs replacing by your ISP or Chorus.
- Look for kinks: no cable should be bent sharply or trapped under a heavy object.
- Check the ports: the router’s incoming cable belongs in the WAN or Internet port, not a standard LAN port.
- Listen for the click: Ethernet plugs should click firmly into place so the contacts seat properly.
- Test the power brick: a failing adapter may light up but not deliver enough power; if you have a compatible spare, try it.
- Buy replacements locally: New Zealand tech retailers stock Cat6 Ethernet cables, but order fibre patch leads through your provider so they match your ONT.
Step 8: Rule Out Billing and Account Issues
Not every outage is technical. If your browser keeps redirecting to a payment page, or speeds have collapsed on an older plan, the cause may be administrative. Log in to your ISP’s billing portal to confirm the account is active and paid before you dismantle any hardware.
| Account issue | Typical sign | Fix |
|---|---|---|
| Suspended for non-payment | Redirects to a “pay now” page | Clear the outstanding balance |
| Data cap on a legacy plan | Very slow speeds after heavy use | Move to an unlimited plan |
| New connection not yet live | ONT lights green but no sign-in | Allow up to 24 hours from the go-live date |
| Device blocked by settings | Only one device cannot connect | Check the router’s parental controls and access list |
Step 9: Build a More Resilient Home Network
If drop-outs keep happening, it is worth reducing how often you have to troubleshoot at all. A few upgrades make a home network far more dependable.
- Add a UPS: a small uninterruptible power supply keeps the ONT and router running through short power cuts.
- Replace ageing hardware: a router more than about four years old may lack the processing power for modern fibre plans.
- Wire what you can: hardwiring a TV or desktop takes load off the Wi-Fi and gives those devices a steadier link.
- Keep a mobile backup: a hotspot-capable mobile plan is a useful fallback on work-from-home days, especially as older 3G networks have now been retired in favour of 4G and 5G.
An occasional outage is annoying but rarely a mystery. Working through triage, a proper power cycle, the ONT lights, the outage maps and then the software fixes will resolve the large majority of home connection faults — and tell you clearly when the problem is one only your provider can fix.
Sources
Frequently Asked Questions (FAQ)
Why is my internet not working even though the router lights are green?
Green router lights mean the hardware link is fine, so the fault is usually a software or DNS problem. Restart the device, flush the DNS cache, or switch to a public DNS server such as 1.1.1.1. If a ping to 8.8.8.8 also fails, the issue is upstream rather than on your computer.
What does the red light on my fibre box (ONT) mean?
A red Optical, PON or LOS light means the ONT has lost the signal from the street, which is a physical line fault. Re-seat the fibre lead and restart the ONT once; if it stays red, contact your ISP so a Chorus technician can be arranged. A red Alarm light means the ONT itself needs replacing.
How do I check whether there is an outage in my area?
Use your phone’s mobile data to open your fibre wholesaler’s status page — Chorus for most of the country, Enable in Christchurch, Tuatahi First Fibre in the central North Island, or Northpower in Whangarei — and enter your address. Your ISP’s own app or status page is worth checking too.
Can a microwave really stop my Wi-Fi from working?
It can interfere with it briefly. Microwave ovens leak energy in the 2.4GHz band, the same band many devices use for Wi-Fi, so nearby devices may slow or drop while the microwave runs. Moving those devices to the 5GHz band avoids the clash.
How long should I wait during a power cycle?
Leave both the ONT and router unplugged for 30 to 60 seconds so any stored charge clears. Power the ONT on first and wait for its optical light to go steady green, then start the router and allow three to five minutes for every light to settle before testing.