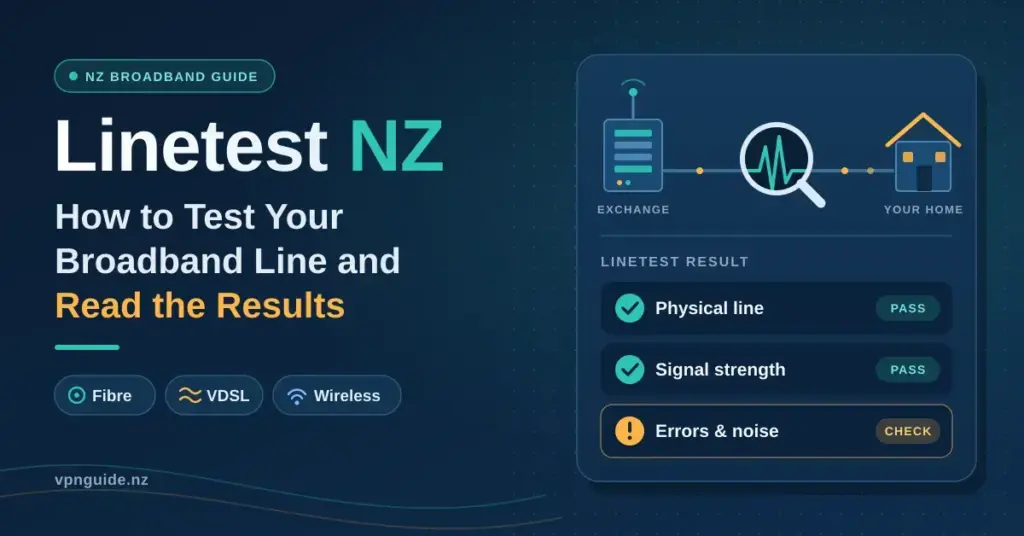
A linetest is a diagnostic that your internet provider — or the network company behind it, usually Chorus or a local fibre company — runs on the physical connection between the exchange and your home. It is not the same thing as a speed test. A speed test measures how much data is getting through right now; a linetest looks underneath that at the health of the actual copper pair, fibre strand or wireless signal feeding your house. For New Zealanders dealing with random dropouts, high latency or speeds that have quietly collapsed, it is the standard first step, because it separates a fault in your own gear from a fault out on the national network. This guide explains what a linetest checks on fibre, VDSL and wireless broadband, how to trigger one, and how to read the result so you can push for the right fix.
Before you ask anyone for a formal linetest, run a quick check of your own. The tool below measures the download, upload, ping and jitter your line is delivering this moment. If those numbers sit far below your plan while you are plugged in with a cable, that is useful evidence to have in front of you when you call. You can also cross-check the result against Chorus’s own internet speed test.
Measures your download, upload, ping and jitter against Cloudflare’s network (normally the Auckland edge for New Zealand connections). Nothing is installed and no personal data is stored.
| NZ plan type (MBNZ Report 28, Apr 2026 tests) | Typical download | Typical upload | Latency |
|---|---|---|---|
| Fibre 100 | 106 Mbps | 25 Mbps | 6 ms |
| Fibre 500 | 508 Mbps | 109 Mbps | 7 ms |
| Fibre Max | 877 Mbps | 502 Mbps | 5 ms |
| 4G fixed wireless | 66 Mbps | 23 Mbps | 48 ms |
| Starlink Residential | 130 Mbps | 47 Mbps | 25 ms |
| VDSL (copper) | 63 Mbps | 21 Mbps | 20 ms |
Test server: Cloudflare (speed.cloudflare.com). Wi-Fi, VPNs and busy household devices all lower the result, so run it two or three times. Averages come from the Commerce Commission’s Measuring Broadband New Zealand programme.
Key points
- A linetest checks the physical line — copper pair, fibre strand or wireless signal — not your Wi-Fi.
- A “clear” result points back at your own gear; a “failing” result is the evidence a provider needs to log a network repair.
- Run your provider's app diagnostic and a wired speed test before booking a technician, to avoid a “no fault found” charge.
- On fibre, a red LOS light means loss of signal — reseat the fibre lead and restart the ONT before logging a fault.
- Copper (ADSL/VDSL) is being switched off in fibre areas, so a failing copper line often ends in a move to fibre.
What a linetest actually measures
When a provider runs a linetest, they send a series of electrical or light signals down the physical line and measure what comes back. On New Zealand’s ageing copper network, a VDSL or ADSL test checks for attenuation (how much the signal weakens over the distance to the cabinet) and crosstalk (interference bleeding in from neighbouring copper pairs). On an Ultra-Fast Broadband (UFB) fibre connection the test is different: it confirms the status of the Optical Network Terminal — the ONT, the box on your wall — and checks that the light arriving down the glass sits inside the acceptable range. If a result comes back “out of spec”, it becomes the technical evidence a retail provider needs to log a formal fault with Chorus or the local fibre company for a physical repair.
- Physical integrity: looks for breaks, water in roadside cabinets and pits, or degraded copper joints.
- Signal loss: measures how much signal disappears between the exchange or cabinet and your wall jack.
- Sync speed: the top speed the physical line can carry today, regardless of the plan you pay for.
- Authentication: confirms your modem is handshaking correctly with the provider’s systems.
| Feature | Fibre linetest | Copper (VDSL/ADSL) linetest |
|---|---|---|
| Medium | Light pulses through glass | Electrical signal through copper |
| Primary check | ONT status and light levels | Sync speed and line noise |
| Distance factor | Not affected by distance | Speed falls off over roughly 800 m |
| Common faults | Kinked or dirty fibre patch lead | Water in pits or old internal wiring |
The role of the Chorus line test system
In New Zealand’s wholesale model, Chorus gives retail providers such as Spark, One NZ and 2degrees a line-test facility that returns real-time diagnostics. It lets a helpdesk agent see whether your modem is syncing, what the ONT is reporting, or whether there is a known outage in your suburb — all without sending anyone to your door. When you phone support and wait while the agent “runs a test”, this is usually what is happening in the background. The idea is a modern descendant of the telephone-era plant test number, which once let technicians check a line remotely from the exchange.
How to start a linetest on your connection
Most deep-level testing has to be triggered by your provider, but the major New Zealand ISPs now build a basic self-service diagnostic into their apps. These check the “heartbeat” of your connection and cross-reference the Chorus internet outages map for any known fault in your area. The quickest way to begin is to open your provider’s app and run its connection check; if the automated test fails or returns an “unstable” result, the app usually offers to book a technician or hands you a reference number to quote when you call.
Provider self-test tools
| Provider | Self-test tool | Where to start |
|---|---|---|
| Spark | In-app connection check | Spark app / MySpark account |
| One NZ | Network status & connection check | One NZ app |
| 2degrees | Connection scan | 2degrees app / My2degrees |
| Chorus (wholesale) | Network status & outage map | chorus.co.nz outages map |
- Provider apps: run the official ISP app’s built-in diagnostic straight from your phone.
- Online account: log in on the provider’s website and look for “manage connection” or “network status”.
- Phone support: call technical support and ask the agent, in plain terms, to “run a linetest” on the physical line.
- Quick visual check: before calling, look at the ONT for a red “LOS” (loss of signal) light, which points to a physical break.
Line fault or Wi-Fi problem?
It is worth confirming that your “internet problem” really is a line fault before you request a professional test. If devices work perfectly beside the router but drop out in the back bedroom, that is Wi-Fi range or interference, not the line. The way to prove a line issue is to test with a physical Ethernet cable plugged straight into the modem or ONT. If the connection is still unstable while wired in, you have solid grounds to ask for a linetest. Our guide to why your internet keeps dropping out covers the other checks worth doing first.
Reading your results: what each outcome means
A linetest usually comes back as “clear”, “failing” or “intermittent”. A clear result means the physical network looks healthy, so anything you are experiencing is more likely down to your router, your Wi-Fi environment or a single device. A failing result is oddly good news when you are troubleshooting: it is the smoking gun that tells Chorus or the fibre company there is a physical cable to fix. Intermittent results are the most frustrating, because a “noisy” line, a loose joint or moisture that only bites in certain conditions can pass one moment and fail the next.
On fibre, the lights on the Chorus ONT tell you most of what a linetest would. Chorus publishes a full fibre box light guide for its ONT models; the picker below turns whatever yours is doing into a diagnosis and a next step.
Look at the small white fibre box (the ONT) on your wall, pick what each light is doing and get a plain-English diagnosis plus the next step.
Based on Chorus’s ONT support guides. Chorus owns the fibre box, but faults are always logged through your internet provider, not Chorus directly. Newer ONT 500 units have ON/OFF and LED buttons underneath – make sure the LEDs are not simply switched off.
- Clear / no fault found: the line is physically fine — look at your router or Wi-Fi setup next.
- Sync loss: the modem keeps losing its connection to the exchange or cabinet.
- Low light (fibre): the optical signal is too weak, often from a dirty connector or a sharp bend in the lead.
- Crosstalk (copper): interference from a neighbouring pair is dragging your speed down.
| Test result | Likely cause | Suggested action |
|---|---|---|
| LOS (red light) | Cut fibre or a major exchange fault | Reseat the fibre lead, restart the ONT, then log a fault |
| High latency | Congestion or a routing problem | Check for background downloads on your own devices |
| Intermittent sync | Corroded copper or a loose jack | Ask for an on-site technician visit |
| Clear result | Your own hardware or a Wi-Fi barrier | Move the router, or add mesh coverage |
Avoiding a “no fault found” charge
If you ask for a technician and they find the problem is your own equipment — a cheap Ethernet cable, a badly placed router, old internal wiring — your provider can pass on a “no fault found” charge that Chorus bills them for the visit. In practice that fee is typically well over NZ$100, and some providers on-charge more. Running your provider’s app diagnostic and a wired test first is the simplest way to avoid it, because a genuine network fault will show up in those checks before anyone is dispatched. If you believe a charge is unfair, Consumer Protection sets out the steps for complaining about a phone or internet service.
Power cycle before you call
Before you spend time on hold requesting a linetest, do a proper power cycle of your hardware — it is the first thing any New Zealand support agent will ask you to do. Powering everything down clears the modem and ONT and lets them build a fresh handshake with the exchange. For fibre the order matters:
- Switch off both the ONT and the modem at the wall.
- Wait a full 60 seconds so any stored charge dissipates.
- Turn the ONT on first and wait for the “optical” light to go solid green.
- Only then power the modem back on and wait for a steady “internet” or “online” light.
- The 60-second rule: a full minute unplugged clears the hardware far better than a quick off-on.
- Sequence matters: bring the network-side box (ONT) up before the consumer-side box (modem).
- Check the patch lead: make sure the thin fibre cable between the wall and the ONT is not kinked or pinched.
- Bypass splitters: on VDSL, remove spare phone-line splitters and plug the modem into the main jack.
VDSL and the master jack
For anyone still on copper VDSL, internal wiring has a real effect on results. Older homes often have several phone jacks wired in a way that creates “bridge taps” — dead spurs of cable that behave like antennas for electrical noise. For the best result your modem should sit at the “master jack”, the first point where the line enters the house. If the connection is slow at a back-room jack but fast at the master jack, the internal wiring is the culprit, not the network.
Why distance matters on VDSL and ADSL
If a VDSL test shows a low sync speed, the usual reason is the physical distance between your house and the roadside cabinet. Copper degrades quickly, so a signal that is strong at 300 m can be marginal past 800 m. A linetest confirms your “loop length” — the total length of copper wire — along with attenuation and the signal-to-noise margin. If the distance is simply too great, no amount of tweaking will raise the speed, and the realistic options are 4G or 5G wireless broadband or waiting for fibre in your street. The Commerce Commission’s Measuring Broadband New Zealand reports show how far real copper speeds trail fibre nationally.
- Loop length: the total run of copper from the cabinet or exchange to your house.
- Attenuation: how much signal strength is lost along that copper run.
- SNR margin: the signal-to-noise ratio — too low, and the line drops out constantly.
- Cabinet plans: check the Chorus map to see whether a closer cabinet or fibre is coming to your area.
| Distance to cabinet | Technology | Typical stability |
|---|---|---|
| Under 400 m | VDSL | High (often near 100 Mbps down) |
| 400–800 m | VDSL | Moderate (roughly 30–70 Mbps) |
| Over 800 m | VDSL | Low, with frequent drops |
| Any distance | Fibre (UFB) | Constant, set by your plan |
Copper is being switched off
Chorus is retiring copper wherever fibre is available. Under the Commerce Commission’s Copper Withdrawal Code, copper in the specified fibre areas is being switched off through the end of 2026, and Chorus is working to retire the copper network nationwide by 2028. Households get at least six months’ written notice plus reminder notices, and if you choose fibre as your replacement it must be installed before the copper is cut. See our overview of internet providers in New Zealand for who sells what, and the TCF copper retirement guide for the consumer detail. If your copper line keeps failing a test, your provider may stop patching it and move you to fibre instead.
Testing 4G and 5G wireless broadband
Wireless broadband has no physical “line” to test in the old sense, but providers can still run a remote diagnostic on the modem. Instead of cable integrity, a wireless test looks at signal strength (RSRP) and signal quality (SINR). If speeds are slow, it shows whether the modem is stuck on a congested cell or simply getting poor indoor reception. Often a “failing” wireless result is fixed by moving the modem onto a higher shelf or next to a window facing the nearest tower.
- Signal strength (RSRP): how much raw cellular signal the modem is pulling in.
- Signal quality (SINR): how clean that signal is — heavy noise means slow speeds even with strong bars.
- Cell loading: whether too many people are sharing the same tower, common during evening peaks.
- Tower distance: which specific cell your modem is authenticated to.
| Metric | Good value | Poor value |
|---|---|---|
| RSRP (strength) | -70 to -90 dBm | Below -110 dBm |
| SINR (quality) | Above 10 dB | Below 0 dB |
| Ping (latency) | 20–40 ms | Above 100 ms |
| Sync status | Connected (4G/5G) | Limited / no service |
External antennas for weak wireless
If a remote diagnostic shows a weak signal, an external antenna can help. This mounts an aerial outside — on a roof or wall — and feeds it to the wireless modem by cable, getting past the insulation and cladding that soak up signal indoors. In marginal areas it can turn a failing wireless test into a stable, usable connection, though it is worth confirming your modem supports an external antenna port first.
Renovations, weather and other physical causes
A common but easily missed cause of a failing test is accidental damage during building work. Plenty of New Zealand fibre and copper leads are buried only a few centimetres down in gardens or run through wall cavities. A cable “nicked” by a spade or a drill may still work but turn highly unstable. A professional test can spot these partial breaks as an unusual spike in signal reflection (TDR testing). If your internet went unstable after work on the property, say so when you request a test — it points the technician straight at the likely spot.
- Garden dig-ups: thin fibre leads are easily cut by shovels or lawn edgers.
- Wall-cavity damage: drilling can snag or strip internal wiring you cannot see.
- Moisture ingress: a damaged jacket lets rainwater in, causing intermittent shorts.
- Rodents: rats chewing cables in roof spaces are a genuine cause of line faults in some suburbs.
| Damage type | Symptom | Typical test result |
|---|---|---|
| Clean break | Total loss of service | LOS / red light |
| Partial nick | Intermittent dropouts | High error counts (CRC) |
| Water damage | Slow or dead during rain | High attenuation |
| Internal short | Modem will not sync | Ground fault on the line |
Protecting your line during DIY
If you are planning landscaping or excavation, use the free national service beforeUdig to find out what runs under your section before you break ground. It returns utility plans at no charge, and for Chorus fibre it can arrange an on-site locator who marks the cable with purple paint. Keeping a fibre lead intact is far cheaper and quicker than re-splicing a severed glass strand afterwards.
Preparing for a technician visit
If a test fails and your provider books a Chorus technician, a little preparation makes the visit far more productive. Clear the space around the ONT, or fibre box, and the lead-in point where the cable enters the house. On copper, make sure the technician can reach every phone jack. It also helps to have a short list of exactly when the connection drops, since that can reveal whether a fault tracks with the weather or with local electrical interference. If you would rather line up help yourself, our guide to finding a local network technician walks through the options.
- Clear access: move furniture away from the ONT and the main jack.
- Secure pets: technicians may need to move between the house and the roadside cabinet.
- Be there: an adult needs to be on site for the visit, which can run from one to several hours.
- Bring evidence: show recent speed-test results or the “failed” status in your ISP app.
Where the Chorus network ends
It helps to know that a Chorus technician is generally only responsible for the line up to the network boundary — usually the ONT or the first phone jack. If the fault turns out to be in your own internal wiring or your personal router, they may offer to fix it for a fee, or simply declare the network side healthy and leave the rest with you. That boundary is also why a wired test matters so much: it puts the question of who is responsible beyond doubt.
Final thoughts
A linetest is the most useful tool you have when an internet connection in New Zealand keeps letting you down. By showing the physical state of your fibre, copper or wireless link, it takes the guesswork out and points straight at the cause of the lag or dropouts. Whether you trigger it yourself through a provider app or work with an agent to run a full Chorus diagnostic, knowing how the process works lets you argue for a fast, correct repair. If the connection is completely down rather than just unstable, start with our guide to internet not working in New Zealand, then use a linetest to confirm exactly where the fault lies.
Sources
- Chorus: ONT fibre box support and light guides
- Chorus: internet speed test
- Chorus: internet outages map
- Commerce Commission: Copper Withdrawal Code FAQs
- Commerce Commission: Measuring Broadband New Zealand reports
- TCF: copper retirement in New Zealand
- Consumer Protection: complaints about phone or internet services
- beforeUdig: free underground cable location
Frequently asked questions
What is a linetest?
A linetest is a diagnostic your internet provider runs on the physical connection between the network and your home. On copper it measures sync speed, noise and attenuation; on fibre it checks the ONT’s status and light levels; on wireless broadband it looks at signal strength and quality. It tells you whether a fault sits on the network or inside your house.
How do I run a linetest myself?
Use your provider’s app: the Spark, One NZ and 2degrees apps all run a basic remote diagnostic and flag known outages. For a deeper test, phone technical support and ask them to run a linetest on the physical line. The speed test at the top of this page shows what your connection is actually delivering in the meantime.
Does a linetest fix my internet?
No. It identifies where the fault is, not the fix. Once it shows a physical break, low light levels or line noise, your provider logs a fault with Chorus or the local fibre company, which sends a technician if one is needed.
Why does my linetest say “no fault found” when my internet is slow?
It means the physical line is healthy, so the problem is inside your home: Wi-Fi range or interference, router settings, an old Ethernet cable, or a single device using all the bandwidth. Plug a cable straight into the router or ONT and test again to narrow it down.
Is there a fee for a linetest?
A remote linetest is free. If a technician visits and finds the cause is your own equipment or wiring, your provider can on-charge a “no fault found” fee, which is usually well over NZ$100. Running the app diagnostic and a wired test before booking a visit is the way to avoid it.
What does a red light on my fibre box mean?
A red LOS light means loss of signal — the ONT is not receiving light down the fibre, so any linetest fails immediately. Reseat the thin fibre lead and restart the ONT; if the red light stays on, log a fault with your provider, as a genuine break needs a Chorus technician.
Can rain or a VPN affect linetest results?
Rain can make a damaged copper line fail as moisture gets into old joints, while fibre is unaffected by weather. A VPN has no effect on a linetest, because the test looks at the physical cable — but switch any VPN off before running a speed test so the result reflects your line, not the VPN server.